5

5HTML and CSS: the basics

5.1

The HTML document structure

At this point, we’re going to write an actual HTML file (a rudimentary website if you will), this will be called index.html and will be written using the Brackets text editor.

For the next couple of chapters we’re going to use a new folder (not the proper one I describe in section 4.2, just a simple one for the purpose of this example) to hold a very simple website and I’m going to use this to demonstrate the basic concepts of HTML and CSS.

Just to give you fair warning, this is going to include pictures of the dogs.

First create a folder in a convenient place on your machine and call it first-site. On my machine it’s here:

z:\ps-publications\first-site

Hey look at that, I didn’t give it a number.

We will now open this folder as a “Project” in Brackets. There are two ways to do this (at least in Windows, not sure about a Mac, but the first method will definitely work on both)—firstly, start Brackets (this will either start with the last opened Project, or a Getting Started Project if it’s the first time you’ve used it).

With Brackets open, click file → open folder… and navigate to the newly created first-site folder and click select folder.

The other way is from Windows Explorer (file explorer not internet explorer), navigate to the newly created first-site folder, right click and select open as a brackets project (Figure 5.1).

In either case, a new project will be opened in Brackets, it will be called first-site and it will look like Figure 5.2.

Figure 5.1 - Open a Brackets project

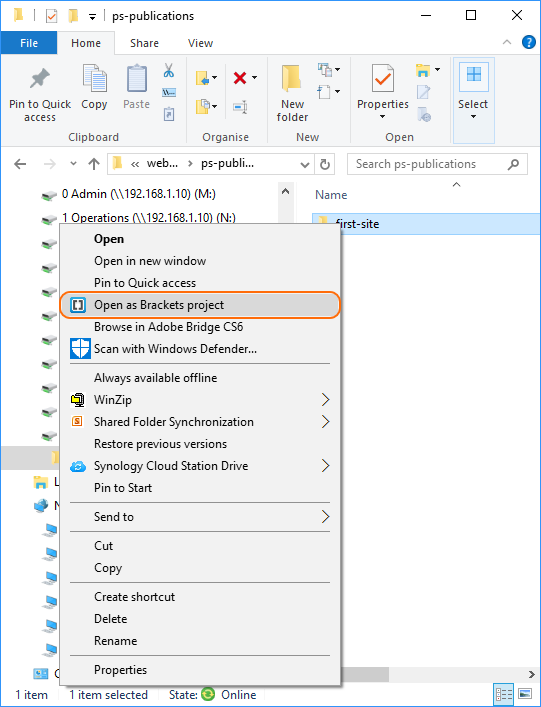
Figure 5.1   Open a Brackets project

Figure 5.2 - New project in Brackets

Figure 5.2   New project in Brackets

Next we need to create a new file. To do this in Brackets, click file → new, a new file called untitled-1 will be created in the working files area (Figure 5.3)

Now right click untitled-1 and select rename and give the file the new name index.html. The final arrangement will look like Figure 5.4.

The file will now have a double angle bracket icon (Brackets icon) next to its name, this indicates that Brackets has recognised it as an HTML file.

  • If there is a small grey dot to the left of the bracket icon ( Brackets icon ), this indicates that the file has not been saved—if the “Autosave Files on Windows Blur” extension has been added, the file will be automatically saved whenever you click off the Brackets window (the grey dot will disappear).
Figure 5.3 - Create a new file

Figure 5.3   Create a new file

Figure 5.4 - Renamed new file

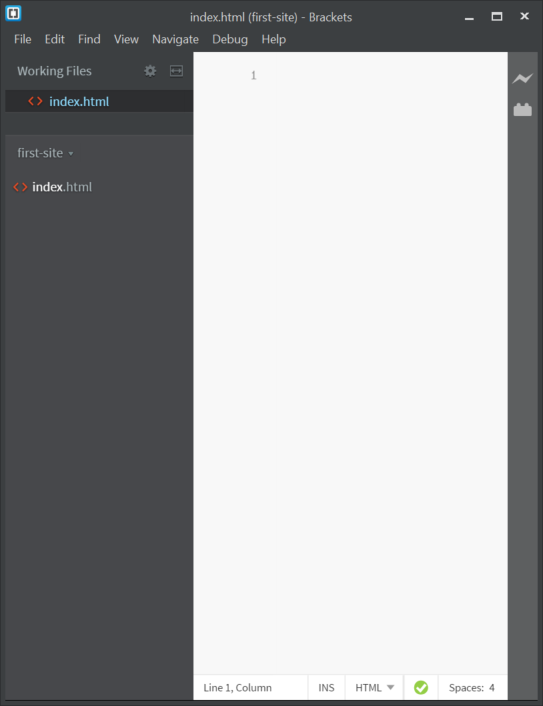
Figure 5.4   Renamed new file

We now (finally) have our index.html file and as has previously mentioned, this is the standard name for the first page of any website.

The basic structure of an HTML document has four parts:

  1. The document type <!DOCTYPE …>,

  2. The HTML section <html>…</html>

  3. within the HTML section, the head <head>…</head>

  4. followed by the body <body>…</body>

It looks like this:

index.html
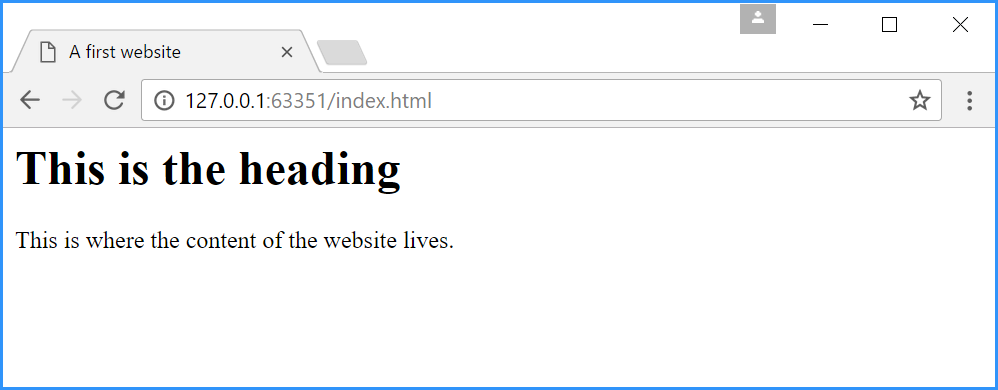
<!DOCTYPE html>
<html>
    <head>
        <title>A first website</title>
    </head>
   
    <body>
        <h1>This is the heading</h1>
       
        <p>This is where the website content of the website lives.</p>
    </body>
</html>

To view the website, just click the live preview button (Brackets icon) on the right hand sidebar of Brackets. If you have Chrome installed, it will open a clean instance†1 of it and display the page. The icon (lightening flash) turns orange when live preview is active.

If you click anywhere in the HTML document in Brackets, the Live Preview will highlight the corresponding part of the page—this makes it easier to find the part of the web page that is being modified.

†1 By clean instance I mean that if you have bookmarks and are signed into Chrome, this will open a new, independent window without your personal information, it will look like Figure 5.5.

In the browser, the page we have just created looks like this (Figure 5.5):

Figure 5.5 - A first website

Figure 5.5   A first website

It’s not much to look at, but it does have some website properties: a title in the tag (“A first website”), a heading and some text on the page. Woohoo it’s a website.

Browsers

A note by the author:

I’ve said a few things about browsers (and I’ve been a bit rude). But here are my thoughts:

The only browser used here is Chrome. I’ve given up on Internet Explorer and I’ve not even looked at Edge. Internet Explorer is too tainted with its past, its low point was IE 8, but even now it pesters, interferes and just generally annoys me (Edge annoys me too, but this is a Windows 10 thing—Edge is the default for everything, even if I’ve told it not to be—so I don’t use it on principal).

If you are using Internet Explorer, particularly if it’s an old version, the kindest thing I can do is encourage you to use another browser—Chrome’s good (and it works with Brackets).

So what does it all mean?—Let’s examine each bit by itself:

5.1.1

The document type
<!DOCTYPE ...>

This is always the first entry in the document; strictly speaking it’s not an HTML tag, it’s an instruction to the browser telling it what type of document follows and what version of that type—there must be no space between the <, ! and the D.

For HTML 5, the document type is always:


<!DOCTYPE html>
                            

The document type for HTML 5 is very simple; this was not always the case, for HTML 4.01 it was:


<!DOCTYPE HTML PUBLIC "-//W3C//DTD HTML 4.01 Transitional//
EN" "http://www.w3.org/TR/html4/loose.dtd">
                            

A bit more of a mouthful, there were other document types too for XHMTL; however, that is all in the past. This is HTML 5 so the DOCTYPE is always <!DOCTYPE html>.

Just to make the point again, the <!DOCTYPE> must be the first entry in the file, it doesn’t have to be on the first line, but there can’t be anything else (other than spaces and line breaks) before it, not even comments.

Missing doctype

If the DOCTYPE is absent, most browsers enter a state called quirks mode that emulates a pre–1999 browser (Netscape 4 or Internet Explorer 5); modern browsers assume that webpages that do not have a DOCTYPE are very old. For this reason, a DOCTYPE must always be declared at the start of a webpage.

5.1.2

The <html> tag

The <html>...</html> element is simply the container for the HTML content of the document everything apart from the <!DOCTYPE ...> is contained in the <html> element.

5.1.3

The <head> tag

The <head>...</head> element holds the page title, the <title>...</title> element is required in HTML documents and is the title of the web page displayed in the browser tab. It also holds scripts, metadata (information about the web page used by search engines) and links to other external files (such as CSS files).

5.1.4

The <body> tag

The <body>...</body> element holds everything that is displayed on the web page (headings, text, links, images &c.).

5.1.5

The other bits

There are two other HTML elements in this basic document; the first is the <h1>…</h1> element, this is in the <body> section and is simply a heading, the h1 tag tells the browser to display text in a larger and bold typeface.

The <p>…</p> element simply encloses a paragraph of text that is to be displayed on the web page.

5.1.6

A note on case

HTML is not case sensitive, tags can be written in any combination of upper and lower case characters, it won’t matter. However…

The convention is to use lower case for all tags,
that’s everything inside the angle brackets <>
so there we are

…Except: DOCTYPE, this should be upper case, it will work perfectly well in lower case for HTML documents; but for XHTML documents it should be upper case (XHTML has stricter rules)—so to avoid confusion just put it in upper case.


End flourish image